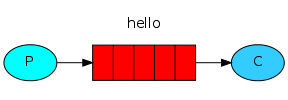
The simplest queue mode in Java RabbitMQ consists of a producer and a consumer.
Currently, Java operations with RabbitMQ mainly use the spring-boot-starter-amqp package of Spring Boot, which is essentially using Spring AMQP to operate the queue.
1. Prerequisite Tutorial
Please read the following chapters to understand the relevant knowledge:
2. Dependency Package
<dependency>
	<groupId>org.springframework.boot</groupId>
	<artifactId>spring-boot-starter-amqp</artifactId>
</dependency>
3. Configure RabbitMQ
Modify the application.yml configuration:
spring:
  rabbitmq:
    host: localhost
    port: 5672
    username: guest
    password: guest
4. Declare Queue
Configure the queue through the Spring Boot configuration class:
package com.tizi365.rabbitmq.config;

import org.springframework.amqp.core.Queue;
import org.springframework.context.annotation.Bean;
import org.springframework.context.annotation.Configuration;

@Configuration
public class QueueConfig {
    @Bean
    public Queue helloQueue() {
        // Declare the queue, and the queue name needs to be unique
        return new Queue("hello");
    }
}
Tip: You can define multiple queues according to business needs. The queue name and the bean id of Queue just need to be different. Here, the method name is the bean id.
5. Send Message
Sending messages requires the RabbitTemplate class, which Spring Boot has already initialized for us. Just inject the instance:
package com.tizi365.rabbitmq.service;

import org.springframework.amqp.core.Queue;
import org.springframework.amqp.rabbit.core.RabbitTemplate;
import org.springframework.beans.factory.annotation.Autowired;
import org.springframework.beans.factory.annotation.Qualifier;
import org.springframework.scheduling.annotation.Scheduled;
import org.springframework.stereotype.Service;

@Service
public class SendService {
    // Inject the RabbitTemplate instance
    @Autowired
    private RabbitTemplate template;

    // Inject the previously defined queue
    @Autowired
    @Qualifier("helloQueue")
    private Queue helloQueue;

    // For demonstration, we use the built-in scheduled task of Spring to send messages regularly (one message per second)
    @Scheduled(fixedDelay = 1000, initialDelay = 1000)
    public void send() {
        // Message content
        String message = "Hello World!";
        // Send the message
        // The first parameter is the routing key, here we use the queue name as the routing key
        // The second parameter is the message content, supporting any type as long as it supports serialization
        template.convertAndSend(helloQueue.getName(), message);
        System.out.println("Sending message '" + message + "'");
    }
}
Tip: Here, we are not directly using the exchange. The underlying default exchange (Direct exchange) will be used.
6. Receive Message
It's also simple for the consumer to receive messages:
package com.tizi365.rabbitmq.listener;

import org.springframework.amqp.rabbit.annotation.RabbitHandler;
import org.springframework.amqp.rabbit.annotation.RabbitListener;
import org.springframework.stereotype.Component;

@Component
// Declare the message listener, specify the queue to listen to through the `queues` parameter, which needs to be consistent with the previous queue name
@RabbitListener(queues = "hello")
public class HelloListener {
	// Use RabbitHandler to mark the message handler, used to execute the message processing logic
    @RabbitHandler
    public void receive(String msg) {
        System.out.println("Consumer - Received message '" + msg + "'");
    }
}
7. Custom Message Type
Previously, we sent a message of type string. In actual business scenarios, we would prefer to directly send various custom Java object types of data.
Define an entity object
package com.tizi365.rabbitmq.domain;

import java.io.Serializable;
import lombok.Data;

// Blog content
@Data
public class Blog implements Serializable {
    // id
    private Integer id;
    // title
    private String title;
}
Send custom type messages
Blog blog = new Blog();
blog.setId(100);
blog.setTitle("Tizi365 RabbitMQ tutorial");

// Send message
template.convertAndSend(helloQueue.getName(), blog);
Receive custom type messages
@RabbitHandler
// Simply change the method parameter to the custom message type
public void receive(Blog msg) {
    System.out.println("Consumer - Received message '" + msg.getTitle() + "'");
}
Use JSON serialization for message content
When RabbitMQ sends Java entity object data, it defaults to using the JDK's object serialization tool. We can change it to use JSON format for data serialization, which allows other languages to consume Java-sent messages and makes the message format more readable.
Modify the earlier configuration class and add the following configuration to use the Jackson JSON parser for message data serialization and deserialization.
@Bean
public Jackson2JsonMessageConverter messageConverter() {
    // Set the default message converter
    return new Jackson2JsonMessageConverter();
}