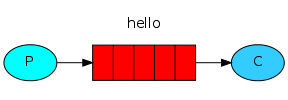
โหมดคิวที่ง่ายที่สุดใน Java RabbitMQ ประกอบด้วยผู้ผลิต (producer) และผู้บริโภค (consumer)
ในปัจจุบัน การดำเนินการของ Java กับ RabbitMQ ใช้หลักการตัว spring-boot-starter-amqp ของ Spring Boot ซึ่งหลักการนี้ใช้ Spring AMQP เพื่อดำเนินการกับคิวอย่างพื้นฐาน
1. บทนำเบื้องต้น
โปรดอ่านบทต่อไปนี้เพื่อเข้าใจความรู้ที่เกี่ยวข้อง:
2. แพคเกจการขึ้นอยู่
<dependency>
	<groupId>org.springframework.boot</groupId>
	<artifactId>spring-boot-starter-amqp</artifactId>
</dependency>
3. กำหนดค่า RabbitMQ
ปรับเปลี่ยนการกำหนดค่าในไฟล์ application.yml:
spring:
  rabbitmq:
    host: localhost
    port: 5672
    username: guest
    password: guest
4. ประกาศคิว
กำหนดคิวผ่านคลาสการกำหนดค่า Spring Boot:
package com.tizi365.rabbitmq.config;

import org.springframework.amqp.core.Queue;
import org.springframework.context.annotation.Bean;
import org.springframework.context.annotation.Configuration;

@Configuration
public class QueueConfig {
    @Bean
    public Queue helloQueue() {
        // ประกาศคิว และชื่อคิวจำเป็นต้องไม่ซ้ำกัน
        return new Queue("hello");
    }
}
คำแนะนำ: คุณสามารถกำหนดคิวมากกว่าหนึ่งตามความต้องการของธุรกิจ ชื่อคิวและ bean id ของ Queue ต้องต่างกันเท่านั้น ที่นี่เราใช้ชื่อเมธอดเป็น bean id
5. ส่งข้อความ
การส่งข้อความต้องใช้คลาส RabbitTemplate ซึ่ง Spring Boot ได้กำหนดไว้ให้เราแล้ว แค่ฉีดส่งตัวอย่าง:
package com.tizi365.rabbitmq.service;

import org.springframework.amqp.core.Queue;
import org.springframework.amqp.rabbit.core.RabbitTemplate;
import org.springframework.beans.factory.annotation.Autowired;
import org.springframework.beans.factory.annotation.Qualifier;
import org.springframework.scheduling.annotation.Scheduled;
import org.springframework.stereotype.Service;

@Service
public class SendService {
    // ฉีดเข้ามาฉาก RabbitTemplate
    @Autowired
    private RabbitTemplate template;

    // ฉีดเข้ามาฉากคิวที่กำหนดไว้ก่อนหน้านี้
    @Autowired
    @Qualifier("helloQueue")
    private Queue helloQueue;

    // เพื่อการแสดงตัวอย่าง เราใช้งานงานจัดการตามตารางที่ซึ่งตามเวลาเป็นเส้นเดียว (หนึ่งข้อความต่อวินาที)
    @Scheduled(fixedDelay = 1000, initialDelay = 1000)
    public void send() {
        // ข้อความ
        String message = "สวัสดี ชาวโลก!";
        // ส่งข้อความ
        // พารามิเตอร์ตัวแรกคือ routing key ที่นี่เราใช้ชื่อคิวเป็น routing key
        // พารามิเตอร์ตัวที่สองคือเนื้อหาข้อความ รองรับประเภทใดก็ได้ตราบใดที่รองรับการจัดลำดับ
        template.convertAndSend(helloQueue.getName(), message);
        System.out.println("กำลังส่งข้อความ '" + message + "'");
    }
}
คำแนะนำ: ที่นี่เราไม่ได้ใช้แลกเซนจ์โดยตรง แต่จะใช้แลกเซนเริ่มต้น (Direct exchange) ของระบบ
6. รับข้อความ
การให้บริโภค (consumer) รับข้อความก็เป็นสิ่งที่ง่ายมาก:
package com.tizi365.rabbitmq.listener;

import org.springframework.amqp.rabbit.annotation.RabbitHandler;
import org.springframework.amqp.rabbit.annotation.RabbitListener;
import org.springframework.stereotype.Component;

@Component
// ประกาศผู้ฟังข้อความ ระบุว่าจะฟังคิวไหนด้วยพารามิเตอร์ `queues` ที่ต้องเหมาะสมกับชื่อคิวก่อนหน้า
@RabbitListener(queues = "hello")
public class HelloListener {
	// ใช้ RabbitHandler เพื่อระบุตัวจัดการข้อความ ใช้เพื่อดำเนินการตรรกะที่เกี่ยวข้องกับการประมวลผลข้อความ
    @RabbitHandler
    public void receive(String msg) {
        System.out.println("ผู้บริโภค - ได้รับข้อความ '" + msg + "'");
    }
}
7. ประเภทข้อความที่กำหนดเอง
ก่อนหน้านี้ เราส่งข้อความประเภทสตริง แต่ในการดำเนินธุรกิจจริง เรามักจะมีโปรด์ซีสนับสนุนการส่งข้อมูลของวัตถุข้อมูลประเภทต่าง อาจจะเลือกที่จะส่งตราบใดข้อมูลของวัตถุของ Java ที่กำหนดเอง
กำหนดวัตถุที่
package com.tizi365.rabbitmq.domain;

import java.io.Serializable;
import lombok.Data;

// เนื้อหาบล็อก
@Data
public class Blog implements Serializable {
    // ไอดี
    private Integer id;
    // ชื่อเรื่อง
    private String title;
}
ส่งข้อความประเภทที่กำหนดเอง
Blog blog = new Blog();
blog.setId(100);
blog.setTitle("คำแนะที่เกี่ยวกับ RabbitMQ ของ Tizi365");

// ส่งข้อความ
template.convertAndSend(helloQueue.getName(), blog);
รับข้อความประเภทที่กำหนดเอง
@RabbitHandler
// เพียงแค่เปลี่ยนพารามิเตอร์ของเมธอดเป็นประเภทข้อความที่กำหนดเอง
public void receive(Blog msg) {
    System.out.println("Consumer - ได้รับข้อความ '" + msg.getTitle() + "' จากผู้ส่ง");
}
ใช้ JSON serialization สำหรับเนื้อหาข้อความ
เมื่อ RabbitMQ ส่งข้อมูลอ็อบเจกต์ของ Java มันจะใช้เครื่องมือสำหรับการซีเรียไลซ์ของ JDK ในค่าตั้งต้น สามารถที่จะเปลี่ยนเป็นการใช้รูปแบบ JSON สำหรับการซีเรียไลซ์ข้อมูล เพื่อให้ภาษาอื่นสามารถบรรจุข้อความที่ถูกส่งมาจาก Java และทำให้รูปแบบข้อความเป็นไปได้อ่านง่ายขึ้น
ปรับเปลี่ยนคลาสการกำหนดและเพิ่มค่าความเป็นไปได้ต่อไปนี้เพื่อใช้ตัวแปรจัดการ JSON สำหรับการซีเรียไลซ์และการถอดรหัสข้อมูลข้อความ
@Bean
public Jackson2JsonMessageConverter messageConverter() {
    // กำหนดตัวแปรจัดการข้อความเริ่มต้น
    return new Jackson2JsonMessageConverter();
}